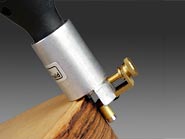
Also, because of the way the grain lays on the top, you should always cut the channel starting from the neck position at the top of the guitar (where the switch goes). Start your cut here and work all the way around until you have finished by going around the inner part of the horn and back up to the neck. If you go in the other direction, you will tear the wood around the horn.
To route the binding slot, i used one of these:
Click HERE for more detail
It's best to take off as little as possible and make a few passes around the job than try to do it all in one go. If you slip, or it tears the wood, your project is ruined.
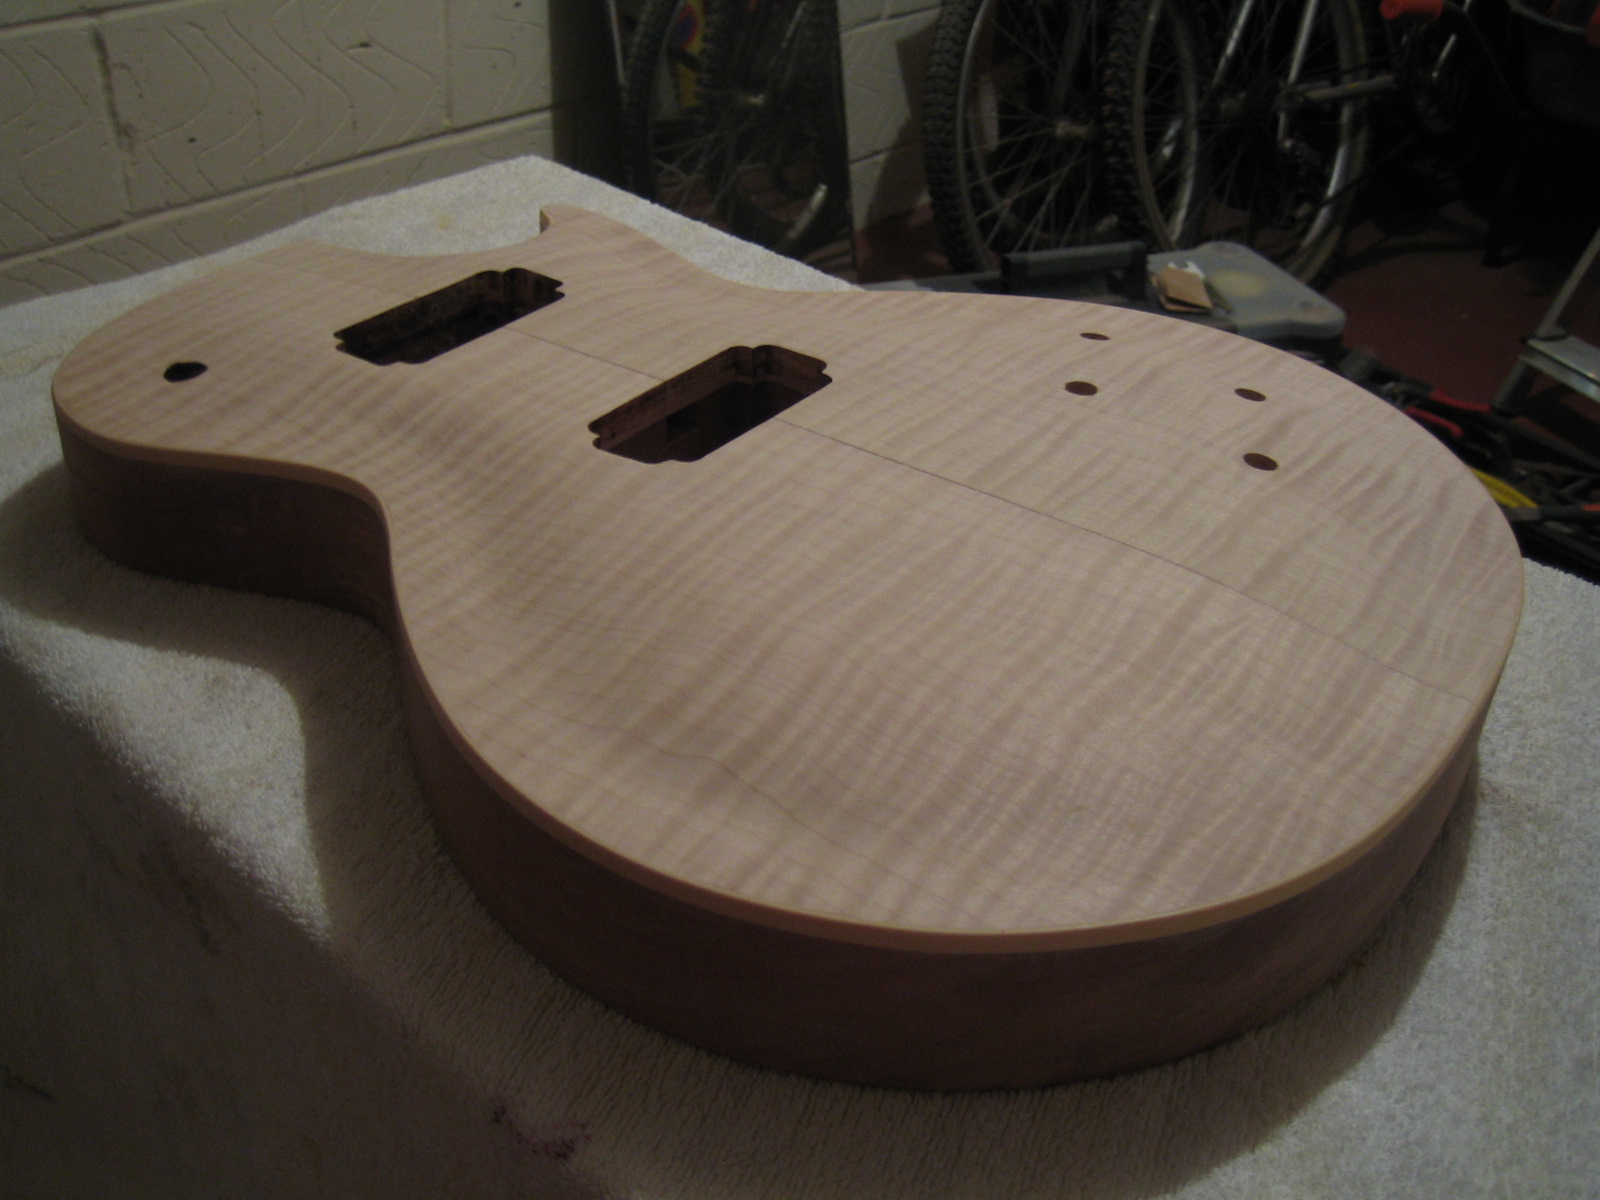
The channel MUST go down to the point where the top meets the body of the guitar and be 2mm in. The binding I have is cream (again, from Stewart Macdonalds) and it measures 6mm deep by 3mm thick. This means that once glued in place, there is a millimeter of height and thickness to play with. IMPORTANT: Make sure your binding channel is super tidy and free from dust or wood particles that will interfere when laying in the binding. It MUST be a precise right angle and be sharp edged and tidy.

I started adding the binding from the top neck position. Prepare plenty of strips of tape to hold it in position and have them at hand, ready to be picked up quickly. I used SuperGlue in the slot and did around 2 inches at a time. Any excess glue can be cleaned off later in the final sanding but try not to get too much on your wood or it may soak in and effect the finish. You can tape up safe areas with masking tape if you wish to protect the wood a little.
Feed in the binding and press it TIGHT in to the slot you have made and secure it immediately with tape. I used thin(ish) strips of carpet tape which meant I could really pull on it tight without it tearing.
Here's how it looks with all the binding taped and glued in place.

I left my binding like this for one day. When all the tape is removed,the binding can then be trimmed down to something nearer the finished size. For this job, I used a combination of a 6 inch steel rule edge for the bulk of the work and a Stanley Knife blade for the tricky areas. Both work well, but watch your fingers.

Trim off enough to make the binding flush with the outer edge and the upper surface of the guitar body. It can be fully smoothed off later when the guitar is final sanded.
With any luck, your binding will be totally flush in the channel with no visible gaps and be nice and tight again all edges. Like this:

The body can now be set aside, somewhere dry and warm for a little while.

No comments:
Post a Comment