14 April, 2010

Preparing the top


The top for the project is a superb piece of flame Maple, bookmatched and roughly the right sort of dimensions that I purchased from North Ridge Hardwoods USA. The above image shows how it arrived as a set. The final overall depth of the top is 13mm when finished and this set is only slightly over, so it is close enough to get to the right size sanding by hand. However, it does not fit side by side properly as there are minor gaps, so it will need the edges sanding for a tight fit.

However, the figuring in the grain look terrific.


To get the bookmatch to fit perfectly, I guess I could have taken the set to a professional joinery company and have them run it through a bench cutter to shave a fraction off the insides, but as this set was very close, it was a simple job to sand them by hand to make them match up properly.

To do this, I tipped my workbench to 90 degrees and taped a strip of sand paper along the back edge. Then, holding the sections flat on the bed, sliding them back and forth to take off any high spots.


Below, you can see how the high spot on this piece was toward the centre by the residue on the sandpaper strip.


Keep working at it carefully, checking every few strokes to see how the joint looks. The end result should be a sharp edge that matches perfectly with it's bookmatched twin.

12 April, 2010

A few more bits have arrived.


Been waiting for these for a while, so it was great to see everything turn up. I have bought a set of Gibson Burstbucker PAF's with nickel finish and a pre-wired kit to be installed later.

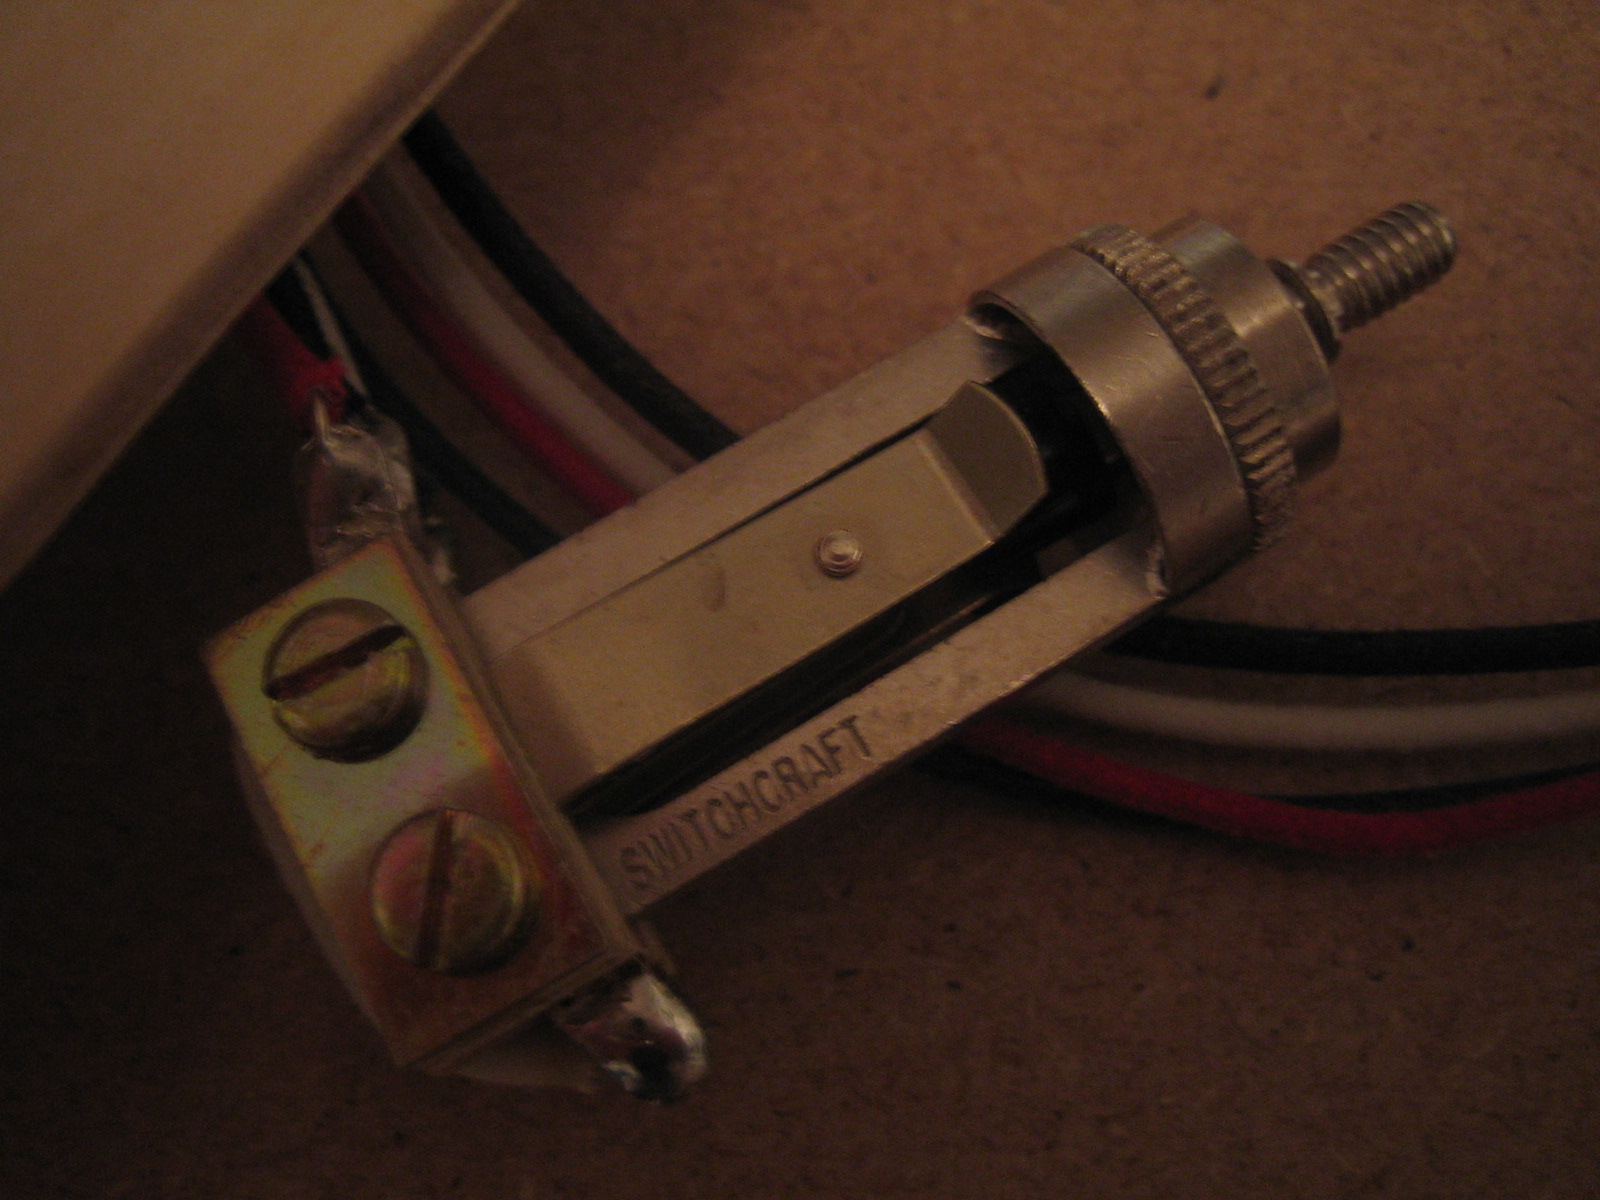
Here are a few shots of the harness. All genuine stuff.


Wiring has never been my strong point, but even I can't mess this up can I? I mean, it is almost done for me. All I have to do is connect a few wires following the diagram that came with it.

All of the above items were bought from Ebay following hours of searching and decisions. The kit I have bought will create a sound close enough to what I am trying to achieve and be suitable for the type of guitar I am making. There are lots and lots of other types of kit I could have bought which would have been perfectly fine, but I set myself a challenge to make this as perfect as possible and I'm sticking with it.

The fretboard


Just for a break from the body and to get a rather tedious job out of the way, the fretboard was done next.

For this, I have a nice piece of Rosewood that i bought as a blank. It is wider than required and I had to actually buy a profile planer to put the radius on it. Unfortunately, I forgot to take pics of it but I will on the next one.

I used my small table saw to cut the fret slots first after marking them all from the plan. I made absolutely sure they were 100% accurate as it is obviously important to the notes the guitar will play when finished. It took absolutely forever to cut them all and get them right.


The trapezoid inlays were actually bought as shown, already cut to shape but a little thicker than required. This meant I could use them to mark out the position of the slots accurately and then set about using my Dremel to cut the recesses. Again, it takes absolutely ages and you need a LOT of patience.


I probably went through almost my entire collection of "bits" to get these right and it almost drove me mental. But they all fit nice and tight. And if you have any doubts about the conditions I'm working in...


Next, I have glued in all the fret markers using epoxy glue. The kind where you use two squirts. 1 of glue, the other of hardener. You can buy it anywhere. It looks a bit messy, but final sanding to create the bevel profile is yet to be carried out.


Profiling was done using a special sander I bought from Stewart Macdonald (USA) to create the bevel on the fingerboard and I then sanded the whole surface by hand using VERY fine paper until it was silk smooth. Couldn't resist applying a little linseed oil to see how it is going to look.

Getting started. The body.


The first thing I start is the actual body. I'm using a piece of lovely grained Mahogany sourced over the internet from the USA. It is soundwood and has been kiln dried. Don't bother purchasing any other kind, with all the effort that goes in to making a guitar, it is wasted if it doesn't sound right when it is finished. Soundwood/tonewood is the only kind that will give you the correct end result.

The body blank /I bought is over-sized, so there is plenty of room to cut out the classic Les Paul shape in one go. When finished, the dimensions of the body are precisely 442mm long from neck are to the bottom end pin and 330mm wide. You need to be ordering a piece of wood that will fit this dimension in to it comfortably. My piece is also a little thicker than required, which also allows me to have the piece thickness sanded and leave a bit extra for final hand finishing.

WARNING: Do not buy a piece of wood and have it "planed" to the correct thickness. It MUST be sanded to thickness. I have to take mine to a specialist woodworking company for this job as I simply don't have the equipment. But for a few pounds, it's worth it. Planing a piece to thickness WILL rip the wood and make all kinds of unsightly marks in it. Possibly beyond recovery. Soundwood is way too dry for a planing machine and it rips it to pieces.

The body, before you begin, should be 45mm thick.

Using my plans as a template, I use a piece of tracing paper and carefully outline the back of the guitar shape for the body. I also mark the position of the cutaway for the switch and pot hole covers as well as the outline of the actual cavities. Then I cut these shapes out using a surgical scalpel. You can now tape the body template to the wood and mark the position for the apertures for the routing mentioned above as well as the outline of the body. This gives an accurate positioning for the work about to be carried out. The outline for the body is only for reference and positioning. A more accurate shape will be created to cut it to shape later. Mark all the shapes from your templates on the body in the correct position. Double check everything.

Again, using the same paper templates, you can make cutter guides for your router and be sure to mark them so you cut everything out the right way round.


If you are careful, you can use these templates over and over. I use double sided tape to stick them to the body and clamp them down whilst I am working. Here is the first template being used to cut the tone/volume pot cavity. For all the templates I make, I use MDF 20mm thick.


You should take time to do this and concentrate. With care, you can achieve perfect edges that are all neat and crisp. The pot cavity does NOT go all the way through as I have seen on many luthier sites when Les Pauls are being copied. It should stop 2mm short of reaching the other side. When you tap the front, it should sound like a drum.


Here's the pot cavity almost finished. Just a little skim of the bottom required and a short while tidying up rough edges. It is clear to see where I have lowered the router in steps to make my cuts.

Once finished, you can remove the template and replace it with the one to cut the cover recess. Again, use a paper template to make an MDF template and position it using the marks you made on the body from your plan paper templates.


Here you can see the cover recess finished in it's correct position in relation to the pencil guides on the body wood. And a nice close up to show the neatness using only the router.


And finally for this part of the work, check the cover fits. This is why it is important to mark cuts and then have the cover on hand to make sure the hole you are about to cut isn't too small or too large. It may be better to use the actual cover as a template to draw around than the plans if they differ.


Next job, again on the back of the guitar is to follow the exact same process to make the hole and recess for the switch. Remember, the more accurate you make your MDF templates, the better the actual cut will be. Here is the switch cavity done.

09 April, 2010

Getting the parts together


This image shows just a few of the parts required to build a Les Paul. Be warned, if you are intending to do this right, it can be fairly costly. Of course, you can opt for cheaper parts made by different companies around the world, and there are massive savings to be made by doing this but this one is going to be built as close to original as humanly possible, so only the best parts are being installed.


The large piece of wood you see here is solid Mahogany that has been kiln dried as all good Luthier soundwoods should be. It is slightly over thicknessed to allow for thickness sanding after work has been carried out on the cavities etc. I shall give dimensions later.

You can see a packet of genuine Kluson Tuners, a rosewood fretboard blank, cream binding plastic and a variety of genuine Gibson parts ready for the build. It is important to have these before you start so that when marking cavities for things such as the pot cover on the back of the guitar, you can double check that the size on the plans matches the actual cover you have bought. You can even use these covers etc as templates to mark the position and size of the cuts you will need to make.


You will also notice there are two partly finished necks there too. I bought these NOS necks quite a while ago and as this was my first build, decided to use one for this project. However, the next build will include making your own neck. Both these necks are factory Les Paul necks that simply require finishing and profiling. They are cut to roughly the right shape and have the truss rod pre-installed. But that's all.

You can buy necks that will be suitable for building a replica like this from quite a few web sites around the world BUT you will have to work on the headstock. for obvious reasons, they do not shape the top in to the unmistakable "open book" shape. But it is a great way to get a head start.

Check out these guys:
stewmac.com

You can get just about anything you need here and yes, they DO ship most of it to the UK. Only solvents and other flamable liquids is a problem.

There are a load of other parts that I will come to as we go along but as I've mentioned, It is important to have them all at the start of the project so you can check fit, measurements and compatibility etc.

You might also notice an original cream pick guard from a 1959 Les Paul that has been foil printed "1960". That is because that was the year it was sold new from the shop first time. But it was "made" in 59, so I know the size and shape is 100% correct.

In these pictures, the necks look a little pale. Probably due to them hanging around in the sunlight waiting to be used. Once shaped and treated, they will return to the original colour OK. Both the body and neck will receive some stain and paint to match them up anyway.


This is a close up of the headstock on the factory unfinished neck. The surface of the wood is rough but it's a perfect easy starter. Check out the locating holes in the neck top they use to position the fretboard. The head of a 59 LP is distinctively different to modern versions, but luckily this unfinished head has plenty of play to make this replica exact.

Here is a better look at the heel.


Very rough finish especially around the heel joint itself. No final shaping has been carried out which is fortunate again because early Gibsons were a little different to how they do them now. By the way, I have check these necks to ensure they are perfectly flat. I'm certain both are fine.

All proper Gibson parts:


The body blank and fretboard blank roughly cut to size.


A close up of the correct type Kluson tuners. These are the ones that would have been fitted at the factory. The one you see here from my set is made by Kluson but is a replica of the original. I can't get closer than that.


This is the veneer that will cover the front surface of the headstock. This is a NOS factory veneer with the Mother of Pearl inlay already in position. These are actually "fibre" boards that later will be glued to the headstock and then cut to shape.


So, I've got the plans, a back-up guitar just in case I need further reference, all the bits and pieces, time to get started...